
Table of Contents
A Comprehensive Guide:
If you’re looking to improve your website’s conversion tracking and optimize your marketing efforts, integrating a Facebook Pixel into your WordPress site is one of the most effective ways to do so. In this guide, we will walk you through the easiest method to connect Facebook Pixel to your WordPress site without needing any coding knowledge. This step-by-step guide ensures your data is accurately tracked, making it easier for you to target the right audience with Facebook ads.
What is Facebook Pixel?
It is a small snippet of code you embed on your website that helps you track user activity, such as conversions, page views, and more. This data allows you to create custom audiences, retarget users, and run more effective Facebook ad campaigns. Essentially, it’s a must-have for any business or individual using Facebook advertising.
Why You Need Facebook Pixel for Your WordPress Site
Before we dive into the steps, let’s look at some of the benefits of adding a Facebook Pixel to your website:
- Track conversions: Know exactly how your Facebook ads are performing by tracking actions visitors take on your site.
- Retarget visitors: Show ads to people who have already visited your site, improving chances of conversions.
- Optimize ads: The data helps optimize ads for better performance by automatically targeting people more likely to take action.
How to Connect Facebook Pixel in WordPress (Step-by-Step)
Step 1: Create Your Facebook Pixel
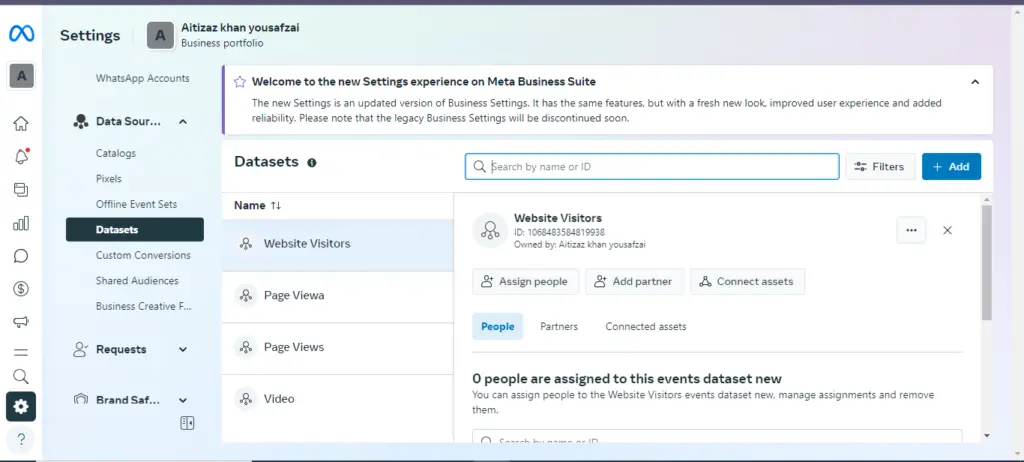
- Log into Facebook Ads Manager
Head over to your Facebook Ads Manager and navigate to the Pixels section under the “Events Manager” tab. - Create a New Pixel
Click on “Add New Data Source” and select Facebook Pixel. Enter your pixel name and website URL, then click Continue.

Step 2: Copy Your Facebook Pixel Code
After when it‘s created, Facebook will generate a unique snippet of code that you will embed on your WordPress site.
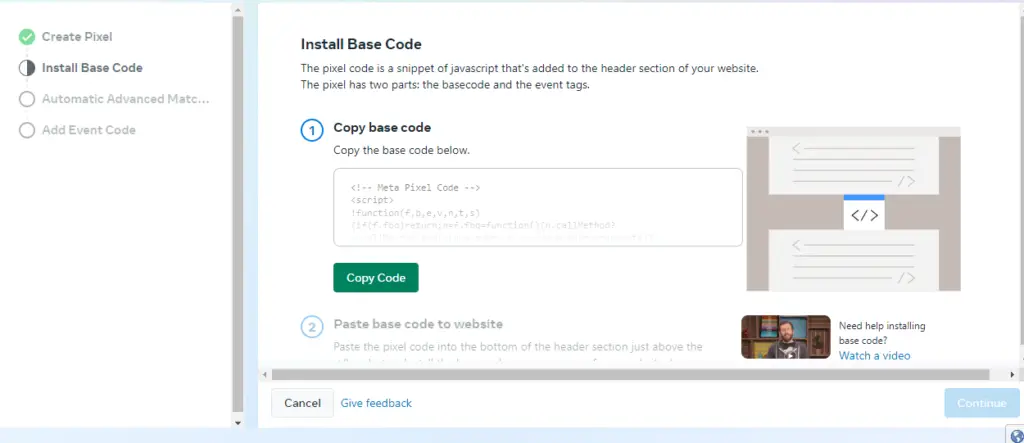
- Click ‘Install Pixel’
Once your Facebook Pixel is created, click on “Install Pixel”. - Select “Manually Add Pixel Code to Website”
If you’re adding the code manually, select this option, and Facebook will display the code. Copy this code.
Step 3: Add the Facebook Pixel Code to Your WordPress Site
The easiest way to add it to your WordPress site is by using a plugin like Insert Headers and Footers.
- Install and Activate the Plugin
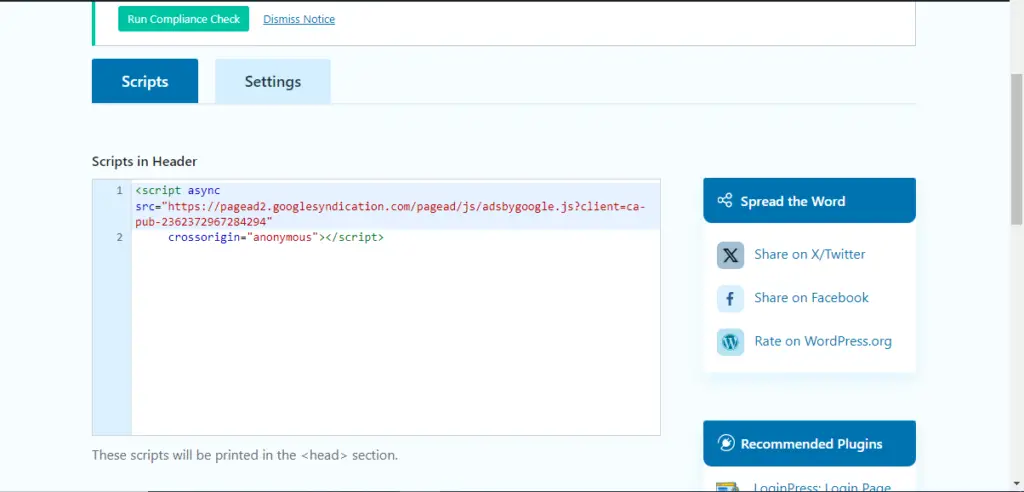
Go to your WordPress dashboard, navigate to Plugins → Add New, and search for Insert Headers and Footers. Install and activate it. - Paste the Facebook Pixel Code
Once activated, go to Settings → Insert Headers and Footers. Paste the code in the Scripts in Header section.
Step 4: Verify Facebook Pixel Installation
Now that you’ve added the Facebook Pixel to your WordPress site, you need to ensure it’s working correctly.
- Install Facebook Pixel Helper
Download the Facebook Pixel Helper extension for Chrome. This tool allows you to check if your pixel is installed correctly. - Check Your Website
Open your website, and click on the Facebook Pixel Helper icon in your browser. If your pixel is working, you’ll see it active and tracking data.
Bonus: Using a Plugin for Easier Setup
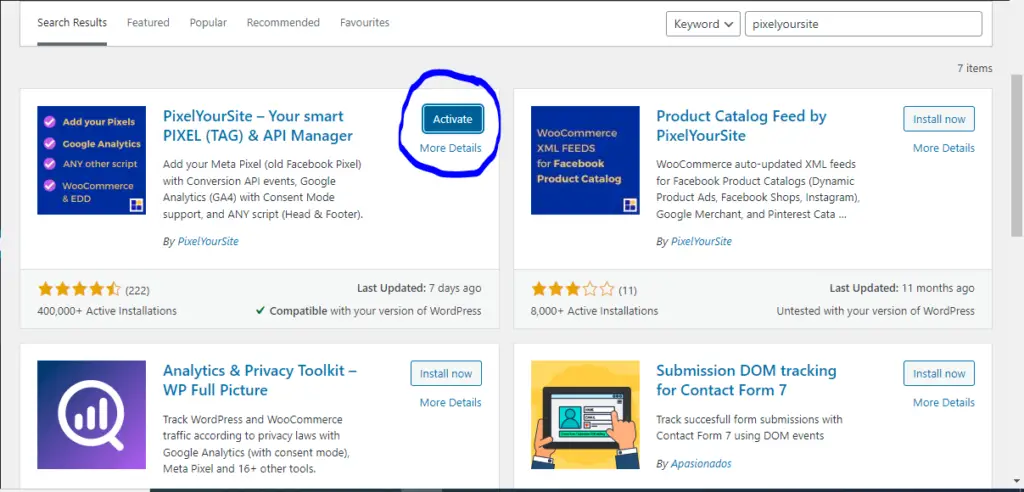
If you want a quicker method, you can use a dedicated plugin like PixelYourSite. This plugin simplifies the process even further.
- Install PixelYourSite
Navigate to Plugins → Add New and search for PixelYourSite. Install and activate it. - Connect Your Facebook Pixel
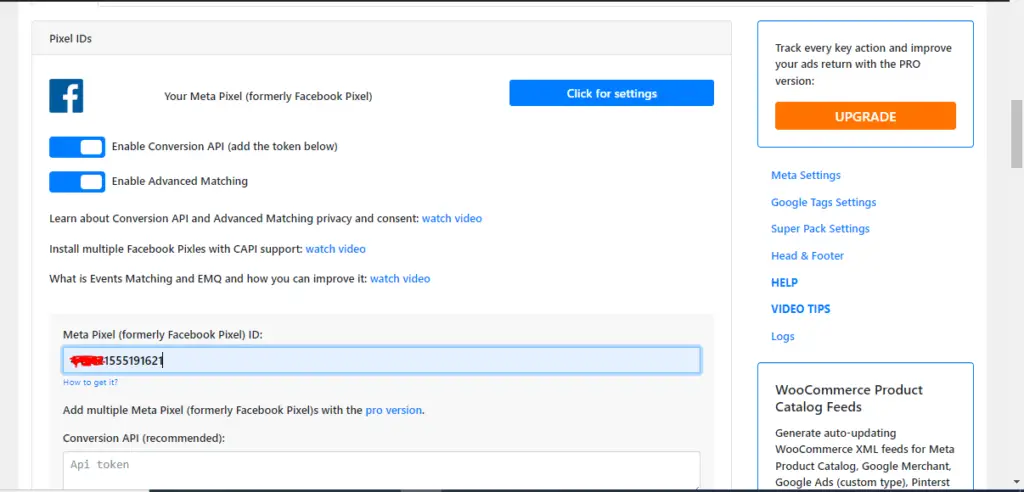
Once activated, go to the plugin settings, input your Facebook Pixel ID, and save changes. The plugin will automatically add the code to all your pages.
Conclusion
Adding a Facebook Pixel to your WordPress site is essential for any serious marketer or business owner. By following these easy steps, you can track key data and optimize your ad campaigns effectively. Whether you manually insert the code or use a plugin, this guide ensures your WordPress site is set up for success.
By keeping your Facebook Pixel properly configured, you can retarget users, track conversions, and ultimately increase your revenue through smarter advertising strategies.

Aitizaz Rahim is a dynamic Digital Marketing and SEO expert, empowering businesses worldwide with proven strategies. As the founder of Masterblogerz, he shares actionable insights to help others master the digital marketing world.



Somebody essentially help to make significantly articles Id state This is the first time I frequented your web page and up to now I surprised with the research you made to make this actual post incredible Fantastic job